
Creating an eTIMS invoice
As the leading KRA & ODPC-approved ETIMs integrator, we at Namiri Technologies, through our DigiTax Platform, have developed a suite of solutions:
- DigiTax App (Mobile PWA)
- DigiTax Dashboard (Web Browser-based Desktop application for e-invoicing) and
- DigiTax API (for system-to-system integration without the issue of platform hopping).
You can create an eTIMS invoice through these three DigiTax solutions.
eTIMS invoice details
If you have joined any DigiTax webinar, then you know how to generate an invoice via the Digitax dashboard. If you have not already joined, below is a link to a webinar recording in which a DigiTax team member talks about DigiTax and how to use it.
You can fast-forward or rewind at your convenience. Please note the following key times on the video linked above:
- 15:51 - Testing how to generate invoices
eTIMS invoice sections
Below is a eTIMS invoice with sections highlighted.
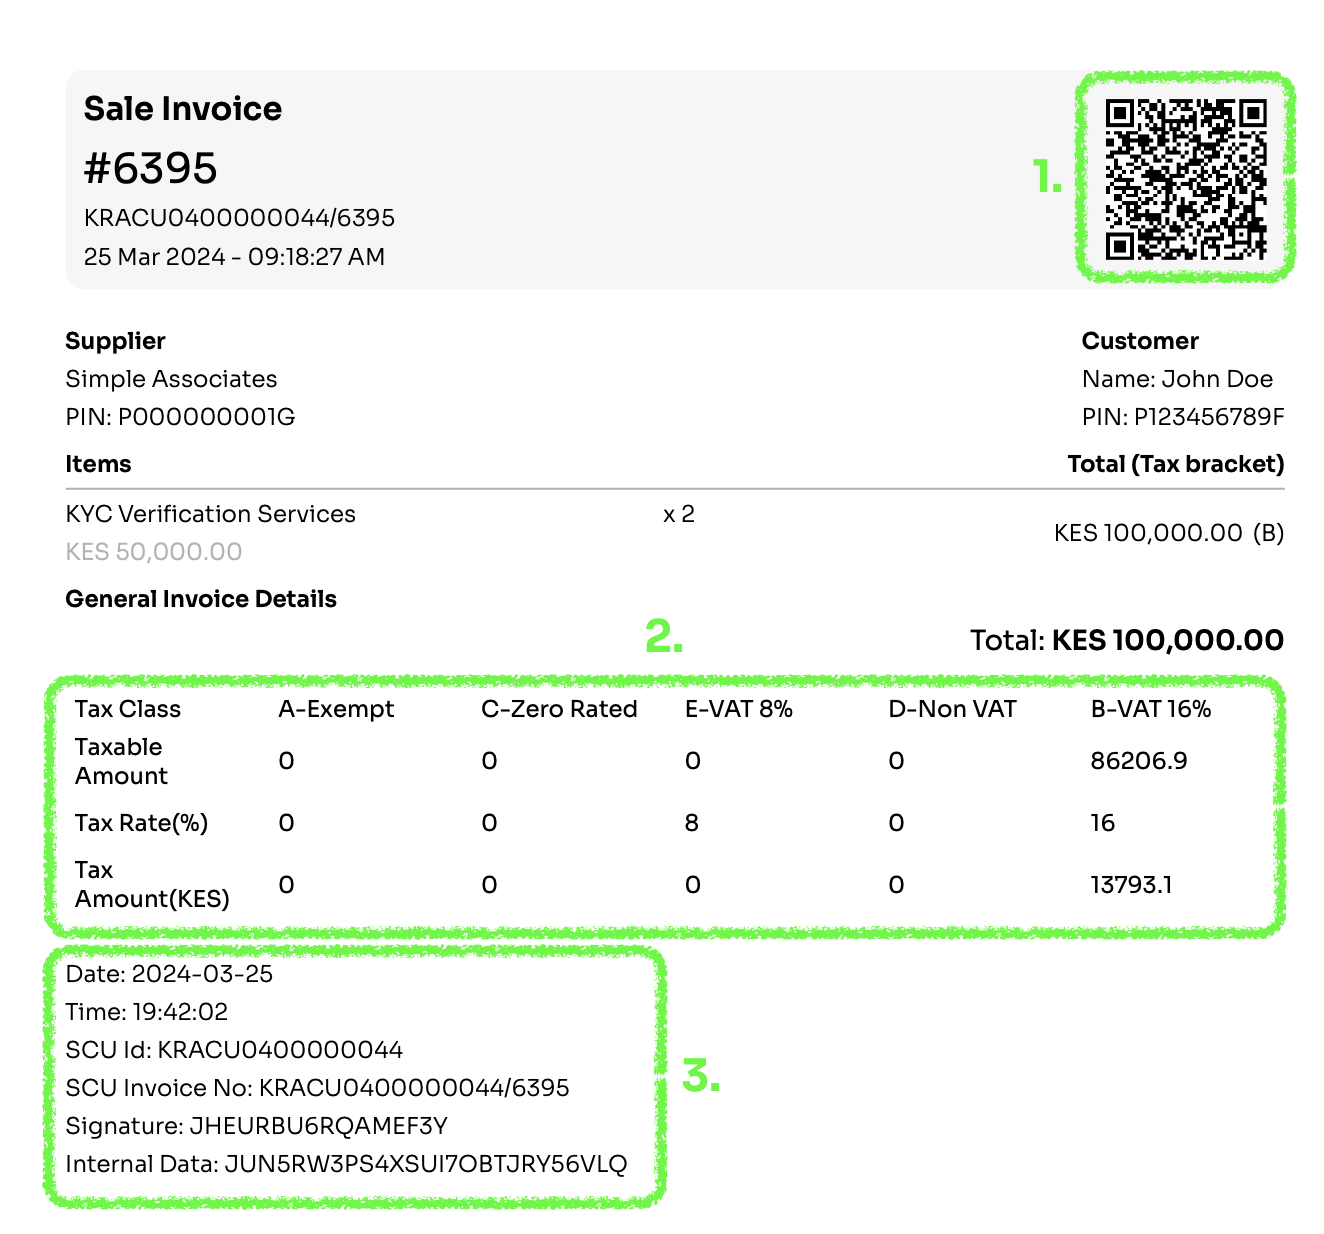
eTIMS sales invoice with key sections highlighted
An eTIMS invoice has three key components: (They are highlighted above)
- A QR code redirecting to the a URL on "etims.kra.go.ke"
The QR code above redirects to this URL: https://etims-sbx.kra.go.ke/common/link/etims/receipt/indexEtimsReceiptData?Data=P000000001G02JHEURBU6RQAMEF3Y
The structure ishttps://etims-sbx.kra.go.ke/common/link/etims/receipt/indexEtimsReceiptData?Data={KRAPIN}{KRA Branch ID}{Signature} - The tax breakdown of that invoice
- eTIMS metadata that includes:
- Date and Time of transaction
- Invoice number
- Signature
- Internal Data
Creating an eTIMS invoice via DigiTax API
To create an eTIMS invoice via the API, you need to:
- Create an item
- Add stock to that item (if it is stockable). If note skip to step 3
- Make a sale
- Get the sale details
Why do I have to create an item before generating an invoice?
In eTIMS, every line item in a sale invoice or credit note invoice needs to be registered first
Below are these steps in detail.
1. Create an item
Make a successful POST request to the items endpoint.
2. Add stock to that item (if it is stockable). If note skip to step 3
Make a successful POST request to the adjust_stock endpoint using the ITEMS ID returned in response of the previous request.
3. Make a sale
Make a successful POST request to the sales endpoint using the ITEMS ID returned in response of the request in step #1
4. Get the sale details
Make a successful GET request to the sales endpoint using the SALES ID returned in response of the previous request.
If the sale queue_status reads complete, then use the following data properties to generate your eTIMS invoice.
- The
etims_urlcreate the QR code. There are several libraries in different programming languages that you can use for this purpose.
If this property is null, then thequeue_statusis not "complete". You'll need to wait since some background processes are not complete. - The
sales_tax_summaryis used to create the tax breakdown - You can use the
receipt_number,serial_number,internal_dataandreceipt_signatureto generate the eTIMS metadata.
etims_urlVSsales_detail_urlThe
sale_detail_urlproperty is the endpoint for a single sale Get sale. It's included in the response so that should you wish, you can make a GET request directly to it.
sale_detail_urlis not the accessible on the browser like theetims_url
etims_urlis used to generate the QR code
Below is a video to follow:
Updated over 1 year ago