
Quickbooks Plugin
Streamlining Tax Compliance with Digitax | Quickbooks Online
Overview
Digitax | Quickbooks integration brings together the power of automated tax management with the convenience and flexibility of online accounting, offering businesses a comprehensive solution to their financial needs and tax compliance.
Simplifying compliance
For businesses operating in regions where eTIMS is mandatory, compliance with tax regulations is crucial. Digitax specializes in providing eTIMS solutions that enable businesses to generate electronic invoices, report transactions to tax authorities, and ensure compliance with tax laws. By integrating Digitax with QuickBooks Online, businesses can now seamlessly sync their financial data with the eTIMS platform, automating the process of tax reporting and ensuring accuracy in compliance.
Seamless Workflow
The integration between Digitax and QuickBooks Online ensures a seamless workflow for businesses. Users can continue to use QuickBooks Online as their primary accounting software, with the added benefit of automated tax management through Digitax. This eliminates the need for manual data entry and reduces the risk of errors, creating a more efficient and reliable process for managing taxes.
To create a connection between Digitax and Quickbooks Online, you need to install and configure the T.I.M.S app on your windows laptop
T.I.M.S App installation and Set-up
- Install the T.I.M.S app for Online and Desktop on your Windows laptop
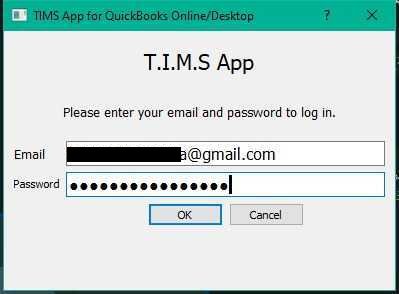
- Once installed, login with the credentials provided
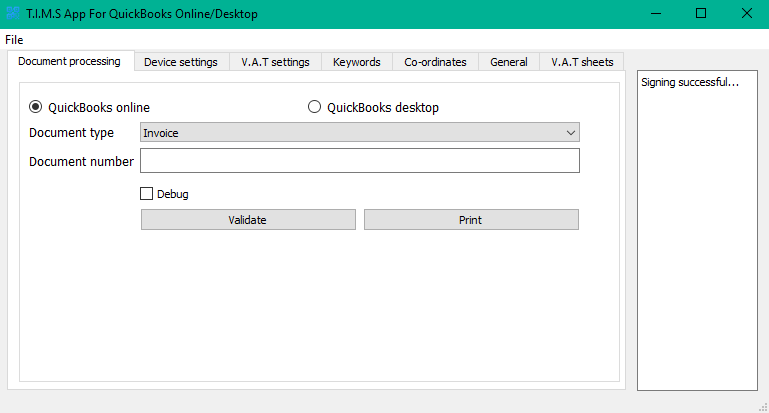
- On the Document Processing tab, select Desktop Online
- Click file, on the top left of the window and save the settings
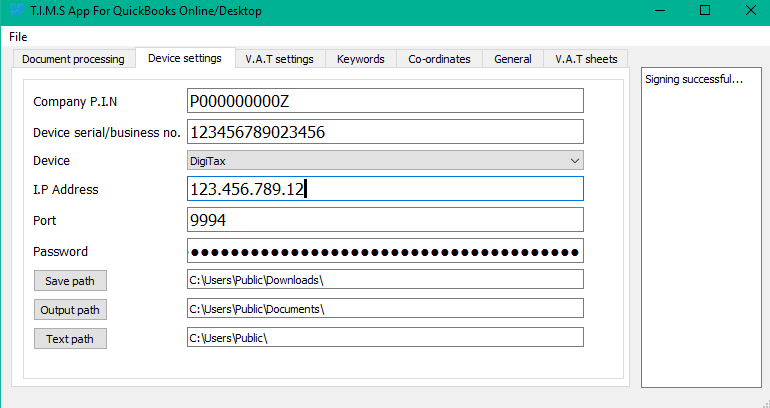
Configure the app with the details provided by the Namiri team
- Navigate to Device settings
- Company pin - eg: P000000000Z
- Device serial number - the business ID from Digitax Dashboard - 12345689900
- Device - Digitax
- IP address
- Port - Optional
- Password - the X-API Key generated from Digitax Dashboard
- Save the Device settings
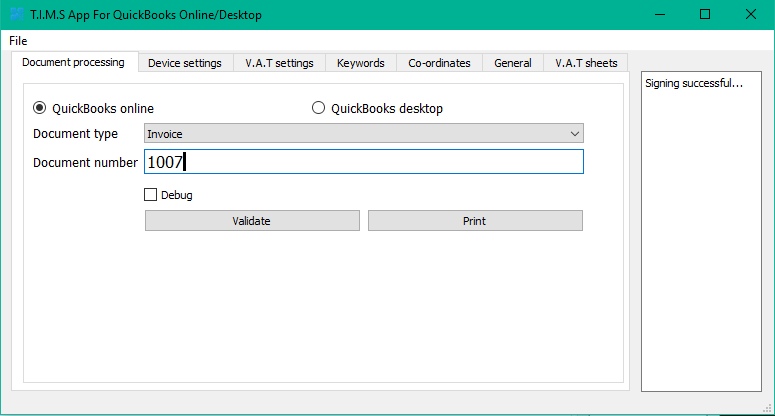
To generate an invoice
- Make sure the invoice is saved on QB online
- Navigate to Documents Processing on the T.I.M.S app
- Select Invoice
- Paste the invoice number generated from your Quickbooks online
- Click validate to generate an ETR invoice
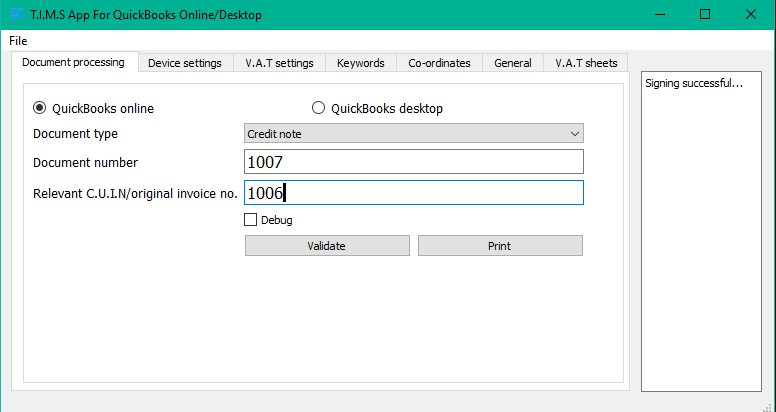
Create a Credit Note
- Navigate to Documents Processing on the T.I.M.S app
- Select credit note
- Paste the invoice number generated from your Quickbooks online
- Paste the original invoice
- Click validate to generate an ETR invoice
The transaction will be visible on both your Quickbooks online system and Digitax dashboard
Updated about 1 year ago